Wednesday, September 29, 2010

Week 11: Pictures Speak!

Align Center


A picture is worth a thousand words. Is it true?


This is the original "Chinese proverb" from the streetcar advertisement. The quotation has wrongly been translated as: A Picture Is Worth One Thousand Words.


In fact, the literal translation is: A Picture's Meaning Can Express Ten Thousand Words.


Somehow the phony Chinese proverb over the years has been given the literal meaning that a picture is equivalent to a thousand words setting up a clash between words and pictures in the minds of users of the two. With digital hegemony, visual messages have reasserted their position as an important communication medium, but at the cost of not recognizing the combination of words and pictures as vital in communication. With the correct interpretation of the proverb, words and pictures live in harmony as they are both used equally in order to understand the meaning of any work that uses them both.


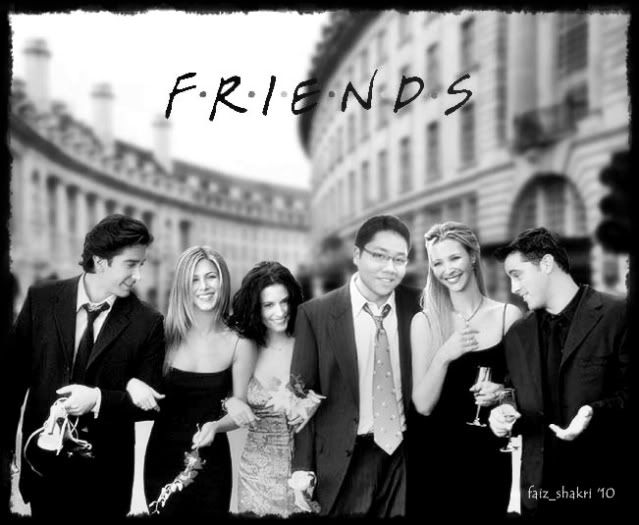
I got feedback for my edited photo today. Apparently, my photo did not convey any message nor did it tell any story. Oh well, I guess I still have plenty of room for improvement, don't I? I thought my photo editing skills were good enough but when I got the feedback, I realized that I still need to learn many, many things. Or maybe learning is really never-ending so you cannot just declare yourself and stop learning because it just doesn't work that way.


I also tried to get comments from my friends about my photo. Most of them could see the message that I was trying to convey (don't go through life unnoticed) but they thought that I could have improved by blurring the background image a little more so that the girl in the picture would stand out from the crowd and the message would be conveyed without question. I did just that, and the result made me happy.


Photo editing has become a piece of cake for me. It no longer feels like a daunting task doing it. It is a mixture of fun and freedom to express your creativity.


Friday, September 24, 2010

Week 10: Helping Hands


In this week’s class, we need to submit the assignments. The assignments that we submitted were "Collection of Teachings Aids" and "Lesson Plans". The assignments have taught me the importance of providing resources for the class in the future.


After that, we continue on completing Module 3 (Editing Picture). This is a continuation of what we did in class last week. Photo editing. I began to enjoy this more and more each time I did it. Photo editing has become a piece of cake for me. It no longer feels like a daunting task doing it. It is a mixture of fun and freedom to express your creativity.


We continued to do the module in class and I got help from my friends to do a few tutorials that I had problems with. My friends were mostly IT experts so they were just too happy to guide me through the tutorials. Thank you so much guys for simplifying the steps for me or else, I would still be sitting here, cracking my head to get a solution.


We had to upload the pictures that we had edited on Photobucket. I got to see many different pictures edited by my friends and I had to say that I was beyond impressed to see such creative photos. Check out mine:


We were also given tasks regarding to Module 2 (Audio Editing).


The tasks are:

• Task 1: Edit a song into ringtone

• Task 2: Blending two songs together

• Task 3: Edit the given song into a better quality


Doing task 1 and 2, I did not have many problems. Task 1 is the easiest one to do. I have chosen the song entitled “I don’t want to miss a thing” by Aerosmith. I just keep the part from the song that I wanted and cut the others. Then, I add some effect such as fade in and fade out to make the tone nice to listen to. For task 2, I have a bit of problem as it is quite hard to find two songs that matched together. I have to consider the tone, the music genre, the voice and etc. it was quite hard and it took a long time for me to find two songs that perfectly matched together.


For task 3, it was quite challenging for me. The song that we need to edit was entitled “Dua Insan” by Siti Nurhaliza and M Nasir. The song has clapping sounds at the beginning and the end of the song. At the middle of the song, there are also some voices from the audiences. We need to clear out these sounds to make the song “clearer”.


Eventhough it was really difficult for me, I manage to do the task given. These are the audio softwares that I used in the process:


Audacity

Audacity is free, open source software for recording and editing sounds. It allows you to record live audio, converts tapes and records into digital recordings or CDs, edit Ogg Vorbis, MP3, WAV or AIFF sound files. You also can cut, copy, splice or mix sounds together with Audacity. Built-in effects are given to remove static, hiss, hum or other constant background noises.


PowerSound Editor

Power Sound Editor Free is a visual audio editing and recording software solution, which supports many advanced and powerful operations with audio data.You can use Power Sound Editor Free to record your own music, voice, or other audio files, edit it, mix it with other audio or musical parts, add effects like Reverb, Chorus, and Echo, and burn it on a CD, post it on the World Wide Web or e-mail it.


Mp3DirectCut

Mp3DirectCut is a fast and extensive audio editor and recorder for compressed mp3. You can directly cut, copy, paste or change the volume with no need to decompress your files for audio editing. Using Cue sheets, pause detection or Auto cue you can easily divide long files.

Thursday, September 16, 2010

Week 9: Photo Editing

I love photo editing, mainly because I've always had a passion for photography. I love to see pictures taken from different angles, different lights and different perspectives. I believe that there is something special about them. When you capture a picture, you capture the story behind the picture as well which what counts most.


Check out some cool software for picture editing.


Adobe Photoshop CS3

This is the hardest software among all the editing softwares included in the module. It is quite tricky to edit the picture because everything is in detail. No wonder all the professional photographers are using adobe photoshop up until CS5 to edit their photos. with skills and practice, a picture edited using Adobe Photoshop definitely look bombastic and really enhance and boost up the quality of a picture.


ACDsee

ACDsee can be used to edit features of a picture like, correcting the colour cast, reducing noise of a picture, crop a picture and resize it. What I can say about this software is it is easy to use even though the features provided are quite simple and limited.


iPhoto

Actually I failed to download iPhoto even though I had tried for so many times. Apparently, the software is only meant for Mac program and I am using Windows. As replacement, I decided to use an online software called Picnic. Since it is an online software, you do not have to download anything, I like it because my laptop is getting slower after all the downloads.


Microsoft Paint

Microsoft Paint is the most simple software that already installed in your laptop or CPU. Paint is a great help when I need to printscreen anything and only choose a part of the printscreen.


Photobucket

Same as Picnic, photobucket allows us to edit pictures online, apart from serving as pictures storage. There are many features provided, you can add frame, add text, edit the exposure and etc.


Photoscape

Photoscape can also be used to add text, Basic Photo Editing, Insert Frame, Insert Frame (Barbie), Noise Reduction and to resize image.


Triscape FXfoto

Before doing the module, this is the first time I've ever heard of Triscape FXphoto. It is quite fun to explore this new software and the features are variety and interesting.

Friday, September 3, 2010

Week 8: Audio Editing

After submitting Module 1, Pn. Foziah gave us the next one; Module 3: Audio Editing. This module is all about how to edit audio files using audio editing software such as Audacity and Sony Pro Vegas.


In my previous lesson planning and simulated teachings, I have used lots of audio but never for once did I edit the audio for teaching and learning. In fact, I never actually saw the need for audio editing. I always took any song for what it was.


Apart from that, every module has it own tasks to be completed. Basically the tasks were collecting teaching aids for certain topics. This was pretty easy actually as we could just have materials from various sources such as video hosting, webpages and blogs as long as they were relevant to the topics. Then, we had to come up with 4 lesson plans in which we incorporated our newly gained knowledge in audio editing. The 4 lesson plans covered all the 4 skills which are speaking, listening, reading and writing. When we planned the lesson, only then it was clear to us that audio editing skills would come in handy for teachers as they would have more resources to work with when planning instructions.


I would like to highlight the learning outcomes. At the end of this module, we should be able to:

1) Change speed, pitch cut and join audio for making better quality audio files.

2) Decrease and increase music tempo.

3) Remove noise from audio, upgrading the quality of stupid audio files.

4) Converting and encoding audio file

5) Changing the type of audio files from wav to mp3

6) Create minus one.

7) Combine two songs

8) Edit music and sound

9) Saving and uploading


I realized that audio editing wasn't that difficult. It doesn’t take a PHD in Audio Editing to do it on your own for your teaching. The knowledge is definitely an asset. I now can edit songs to be my ringtone and that is a huge accomplishment for someone like me.